Signup for a Getflix account. Once you have signed up, come back to this page and configure the DNS server settings on Windows 7.
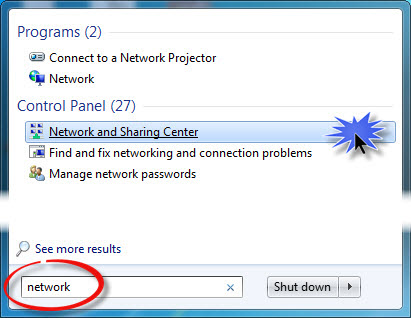
Open the Start Menu and type "network" in the search box. Find and click the "Network and Sharing Center" link under the "Control Panel" heading.
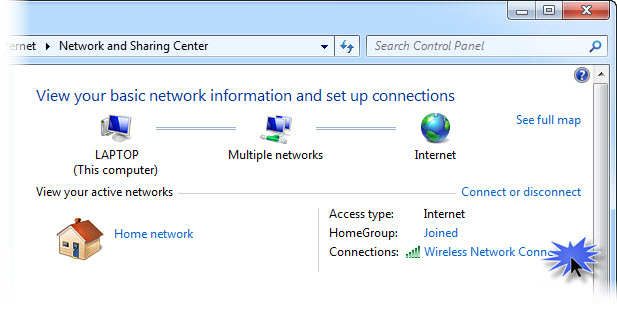
Locate your "Internet" connection and click the link that says "Wireless Network Connection" or "Wired Network Connection".
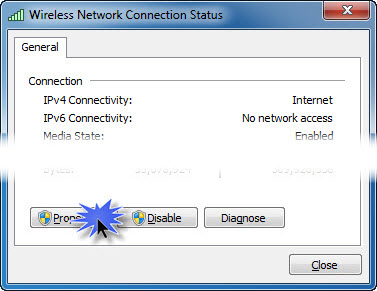
Click the "Properties" button.
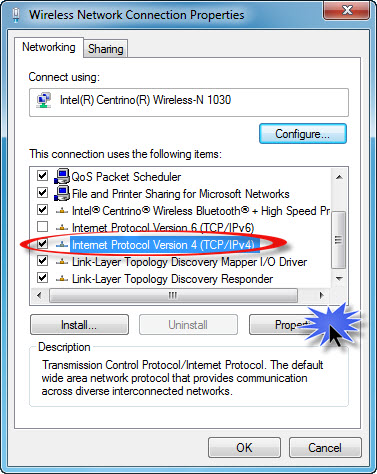
Locate the item in the list that reads "Internet Protocol Version 6 (TCP/IPv6)" and ensure that it is disabled (not checked).
Locate and select the item in the list that reads "Internet Protocol Version 4 (TCP/IPv4)", then click the "Properties" button.
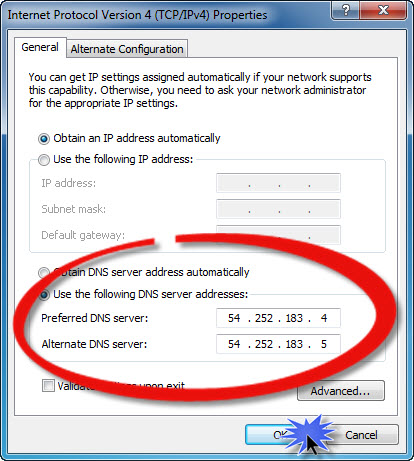
Click the radio button that says "Use the following DNS server addresses", then enter the 2 DNS addresses as shown on the Overview page. Once complete, click the "OK" button.
Thats it! You should now be able to access (and sign up for) Netflix and Hulu Plus.
To get started with Smart DNS you will need a Getflix account and you will need to configure your devices.
Here's how in 2 easy steps:
Getflix provides the easiest and most affordable way of accessing global streaming on multiple devices.