Download the Getflix app for Mac! This app allows you to quickly add/remove our DNS servers on your Mac, keep your IP up-to-date and change regions.
Download the Getflix app for Mac
If you download and install the Getflix app for Mac, there is no need to complete the steps below.
Signup for a Getflix account. Once you have signed up, come back to this page and configure the DNS server settings on your Mac.
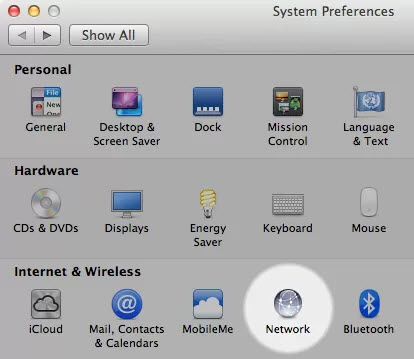
From the Apple menu, select "System Preferences", the window shown below should appear. Then click on the "Network" icon.
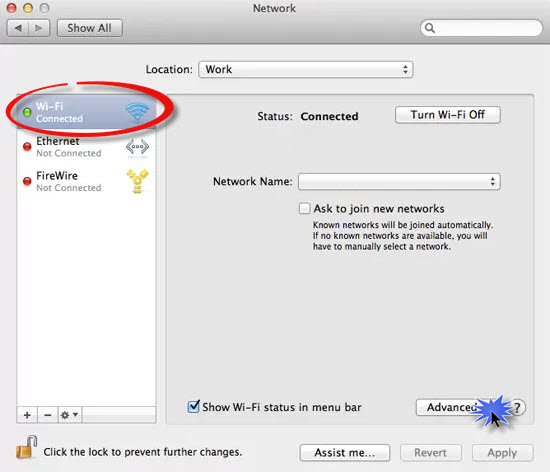
Select your Network Connection. Choose "Wi-Fi" if you use wireless or "Ethernet" if you use a cable. Your current connection will have a green dot shown next to it. Click the "Advanced" button.
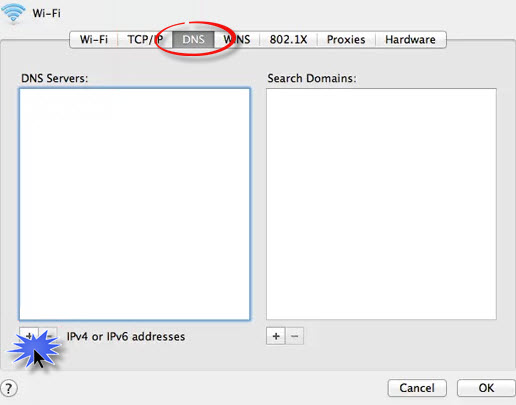
Select the DNS tab and click the "+" button then enter the 2 DNS addresses as shown on the Overview page. Use the "-" to remove the existing entries. Click "OK" when complete.
Thats it! You should now be able to access (and sign up for) Netflix and Hulu.
To get started with Smart DNS you will need a Getflix account and you will need to configure your devices.
Here's how in 2 easy steps:
Getflix provides the easiest and most affordable way of accessing global streaming on multiple devices.